
Uninstall Pearcleaner on Mac fully

Pearcleaner doesn’t get uninstalled cleanly when you drag it to the Trash. The app vanishes, but ~/Library holds on to preference files, caches, an application support folder, and a Finder extension container; macOS never removes those on its own.
This guide shows you how to remove Pearcleaner completely: either automatically with App Cleaner & Uninstaller or manually through Finder, so nothing gets left behind.
Test environment: Pearcleaner v.5.4.3, MacBook Pro M1, macOS Tahoe 26.4.1.
This article contains:
- 1. How to uninstall Pearcleaner in a few clicks
- 2. How to delete Pearcleaner manually in Finder
- 3. FAQs
How to uninstall Pearcleaner in a few clicks
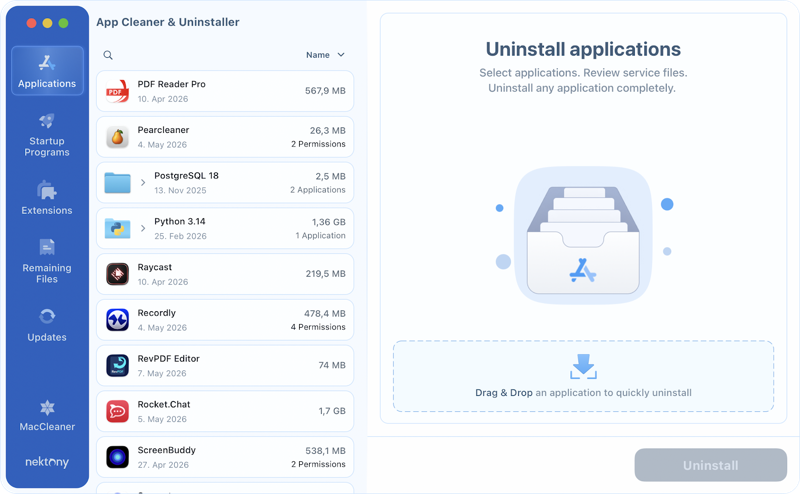
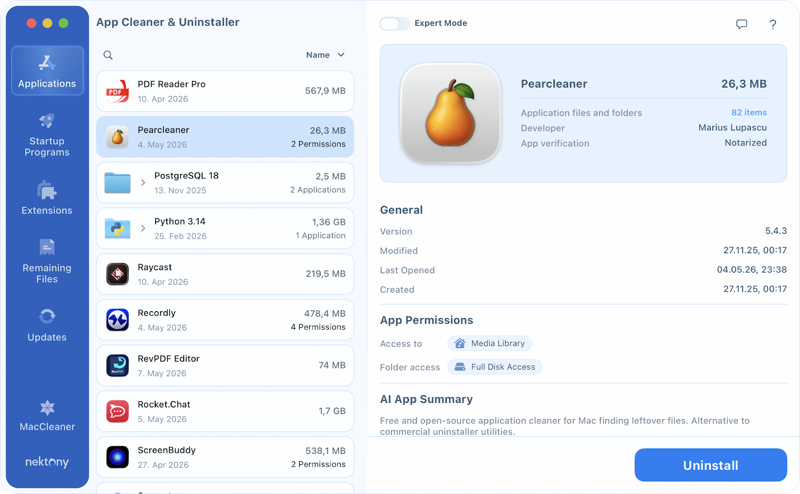
App Cleaner & Uninstaller runs one scan and finds everything: the app bundle plus all support files scattered across your Mac. It’s the safest and quickest way to fully remove Pearcleaner in one action without digging through Library folders yourself.
How to uninstall Pearcleaner with App Cleaner & Uninstaller:
- Install and run App Cleaner & Uninstaller.
- Let the scan complete → locate Pearcleaner.

- Select Pearcleaner.
- Click Uninstall → confirm in the preview by clicking Remove.
- Terminate Pearcleaner via App Cleaner & Uninstaller if it’s still open.
- Wait for the removal to finish → click Close.


How to delete Pearcleaner manually in Finder
The manual method takes more trips. Delete the app bundle first, then work through each ~/Library path individually, because nothing is cleaned up automatically.
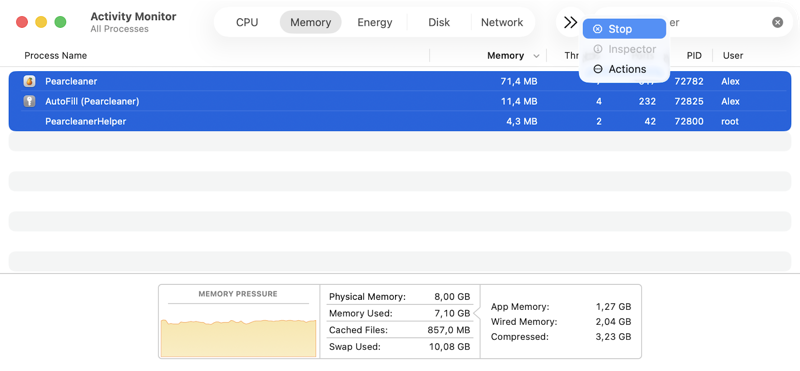
Step 1: Quit Pearcleaner before you start.
- Press Cmd+Q inside the app, or
- Open Activity Monitor → search for Pearcleaner → select its processes → click the X button.
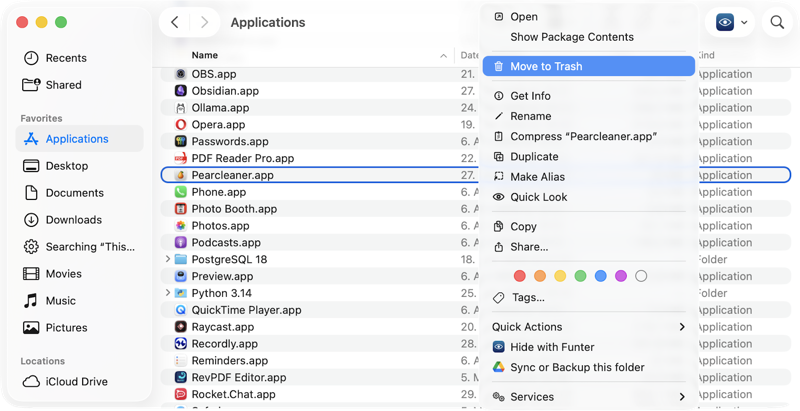
Step 2: Delete the Pearcleaner application.
- Open Finder.
- Go to the Applications folder.
- Find Pearcleaner.app.
- Right-click → Move to Trash.
Step 3: Delete all Pearcleaner service files.
- In Finder, press Shift+Cmd+G → paste ~/Library/Application Support/Pearcleaner/ → press Return.

- Move the Pearcleaner folder to Trash.

-
Keep deleting the remaining paths in the above-explained manner:
- ~/Library/Application Scripts/com.alienator88.Pearcleaner.FinderOpen
- ~/Library/Preferences/com.alienator88.Pearcleaner.plist
- ~/Library/Caches/com.alienator88.Pearcleaner/
- ~/Library/HTTPStorages/com.alienator88.Pearcleaner/
- ~/Library/HTTPStorages/com.alienator88.Pearcleaner.binarycookies
- ~/Library/Containers/com.alienator88.Pearcleaner.FinderOpen


Step 4: Empty Trash.
Final insights
- Try App Cleaner & Uninstaller to remove Pearcleaner and all its files it left in ~/Library in one go.
- Going with the Finder method means visiting each Library path yourself.
Frequently asked questions
Is Pearcleaner safe to use on Mac?
Pearcleaner is open-source and generally considered safe. However, because it needs broad system permissions (including Full Disk Access), it should be downloaded only from the official GitHub repository to avoid modified versions. This app is not malicious.
Another concern is safety during removal. Some users on Reddit report issues such as deleting the wrong files and encountering false positives. That’s why it’s important to adjust the sensitivity settings and always review the file list before clicking Delete.
Is Pearcleaner good enough to replace a paid app uninstaller?
Pearcleaner is a capable free tool for basic app removal. For many users, it’s good enough. It works on the same principle as paid uninstallers by scanning standard Library paths for files associated with an app’s bundle identifier. However, there are drawbacks:
- No guarantee of complete cleanup. Some deeply nested support files, login items, or helper components may still require manual checking.
- The Orphans feature needs extra caution. It may detect leftover files, but you need to find out which app they belong to, making accidental deletion more likely.
- False positives can happen. Some users report that unrelated files are occasionally flagged, so reviewing the deletion list is essential.
- Less support. Since it’s an open-source project, updates and troubleshooting depend on community support rather than a dedicated support team.
- Fewer maintenance tools. Although Pearcleaner has an updater, it lacks extras like a startup items manager or broader maintenance tools.
So, for a Mac, you clean occasionally, Pearcleaner is a reasonable free option.
Is Pearcleaner good for updating apps?
Pearcleaner’s primary purpose is app removal, not app updates. It does include a built-in updater, which can check for updates for some apps, but that feature is secondary.
There are also a few limitations to keep in mind:
- It doesn’t update Homebrew apps. Those still need to be updated manually using the brew upgrade command in Terminal.
- It doesn’t manage Mac App Store updates. Mac App Store apps update through the App Store, not out of the box.
- Its update KPIs are not high. Compared to other update tools like Updatest or App Cleaner & Uninstaller, Pearcleaner may detect fewer available updates.
So, Pearcleaner’s updater is a nice bonus, but app updates aren’t what it’s built for. For regular updates, it’s better to use a dedicated app updater.