Uninstall Applications
In the Applications section, you can find all installed apps on your Mac and the lists of their service files.
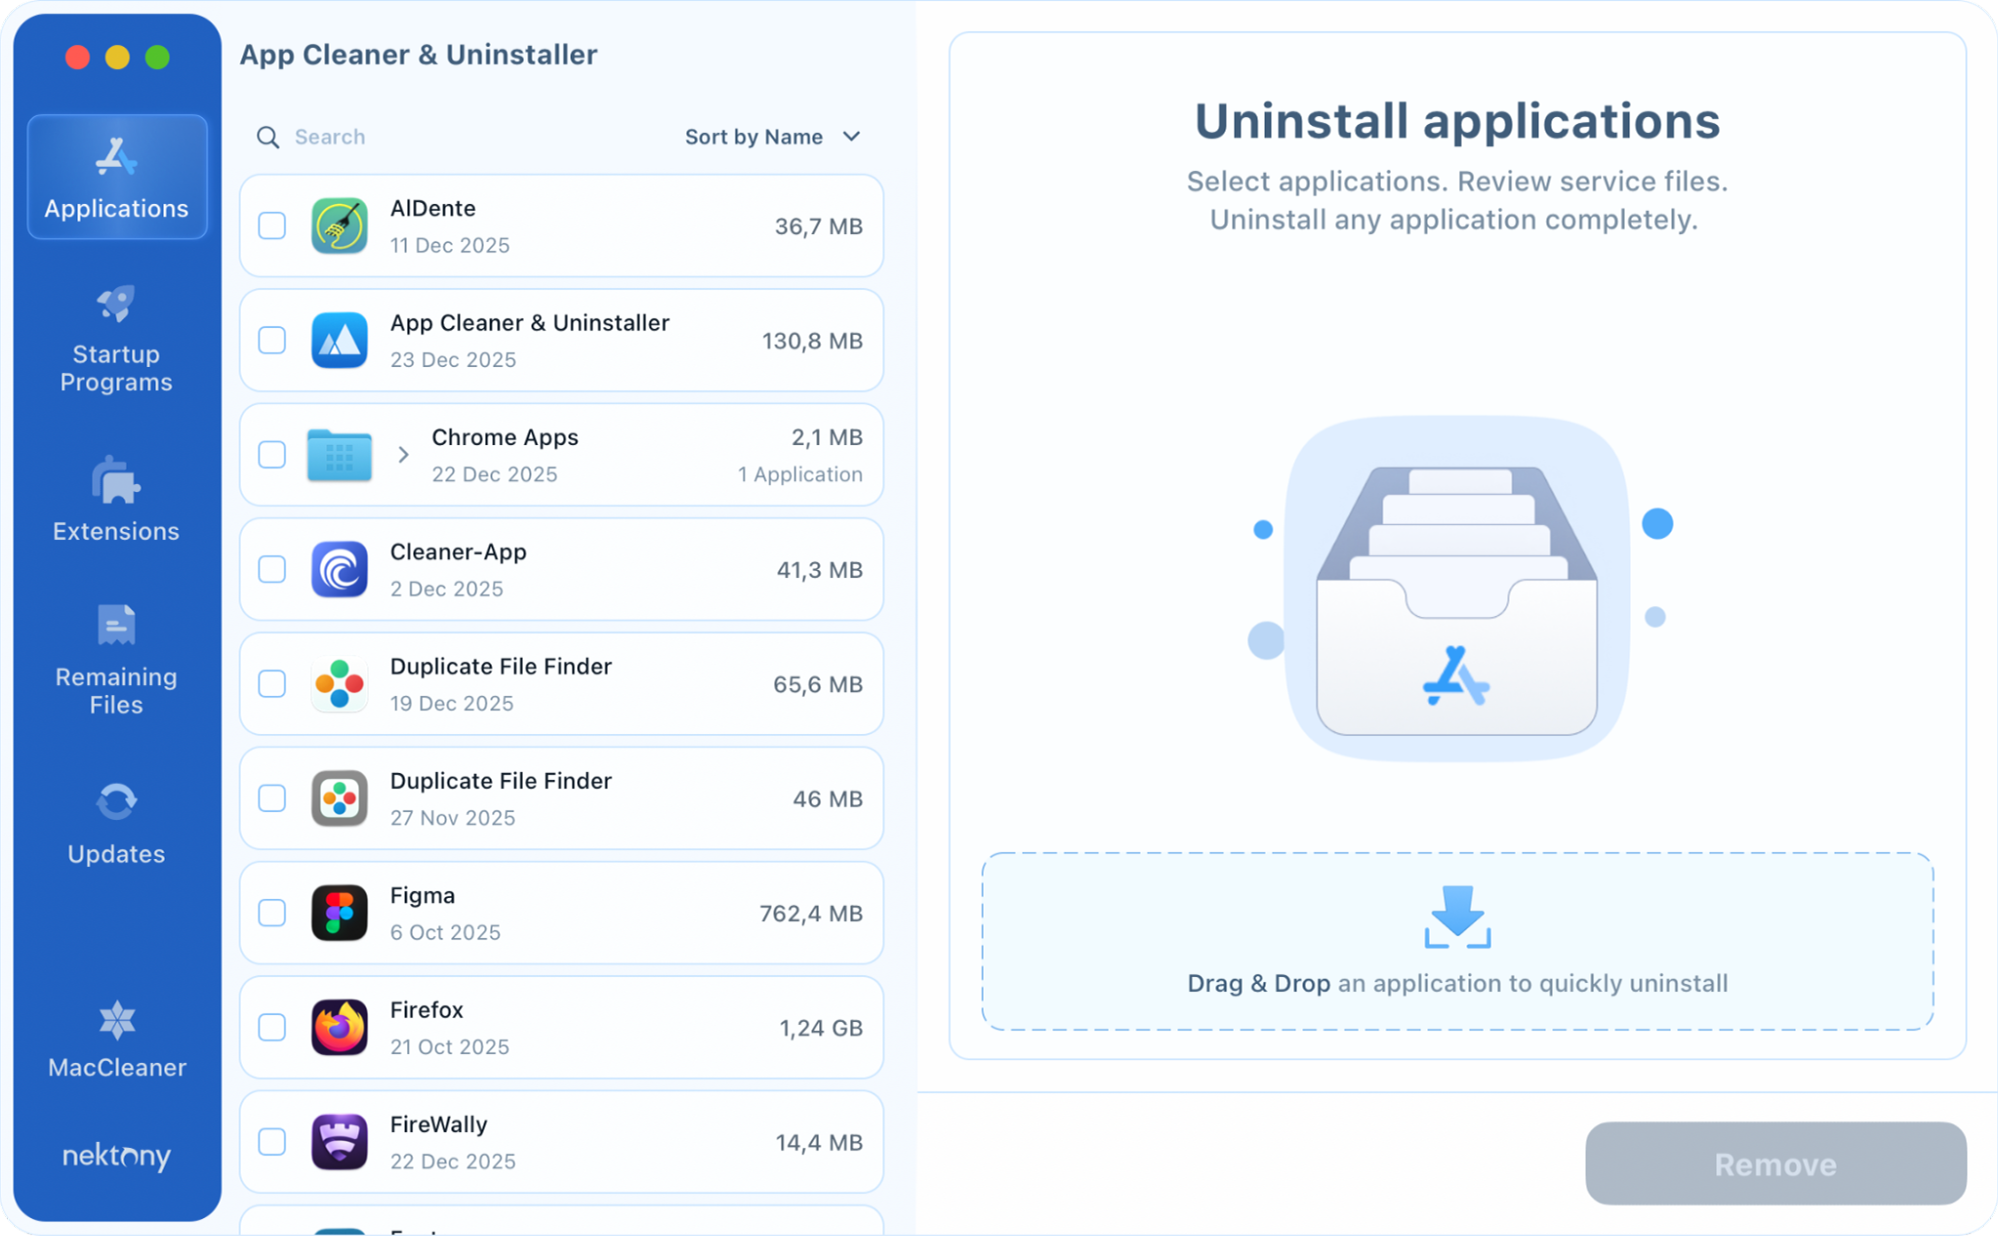
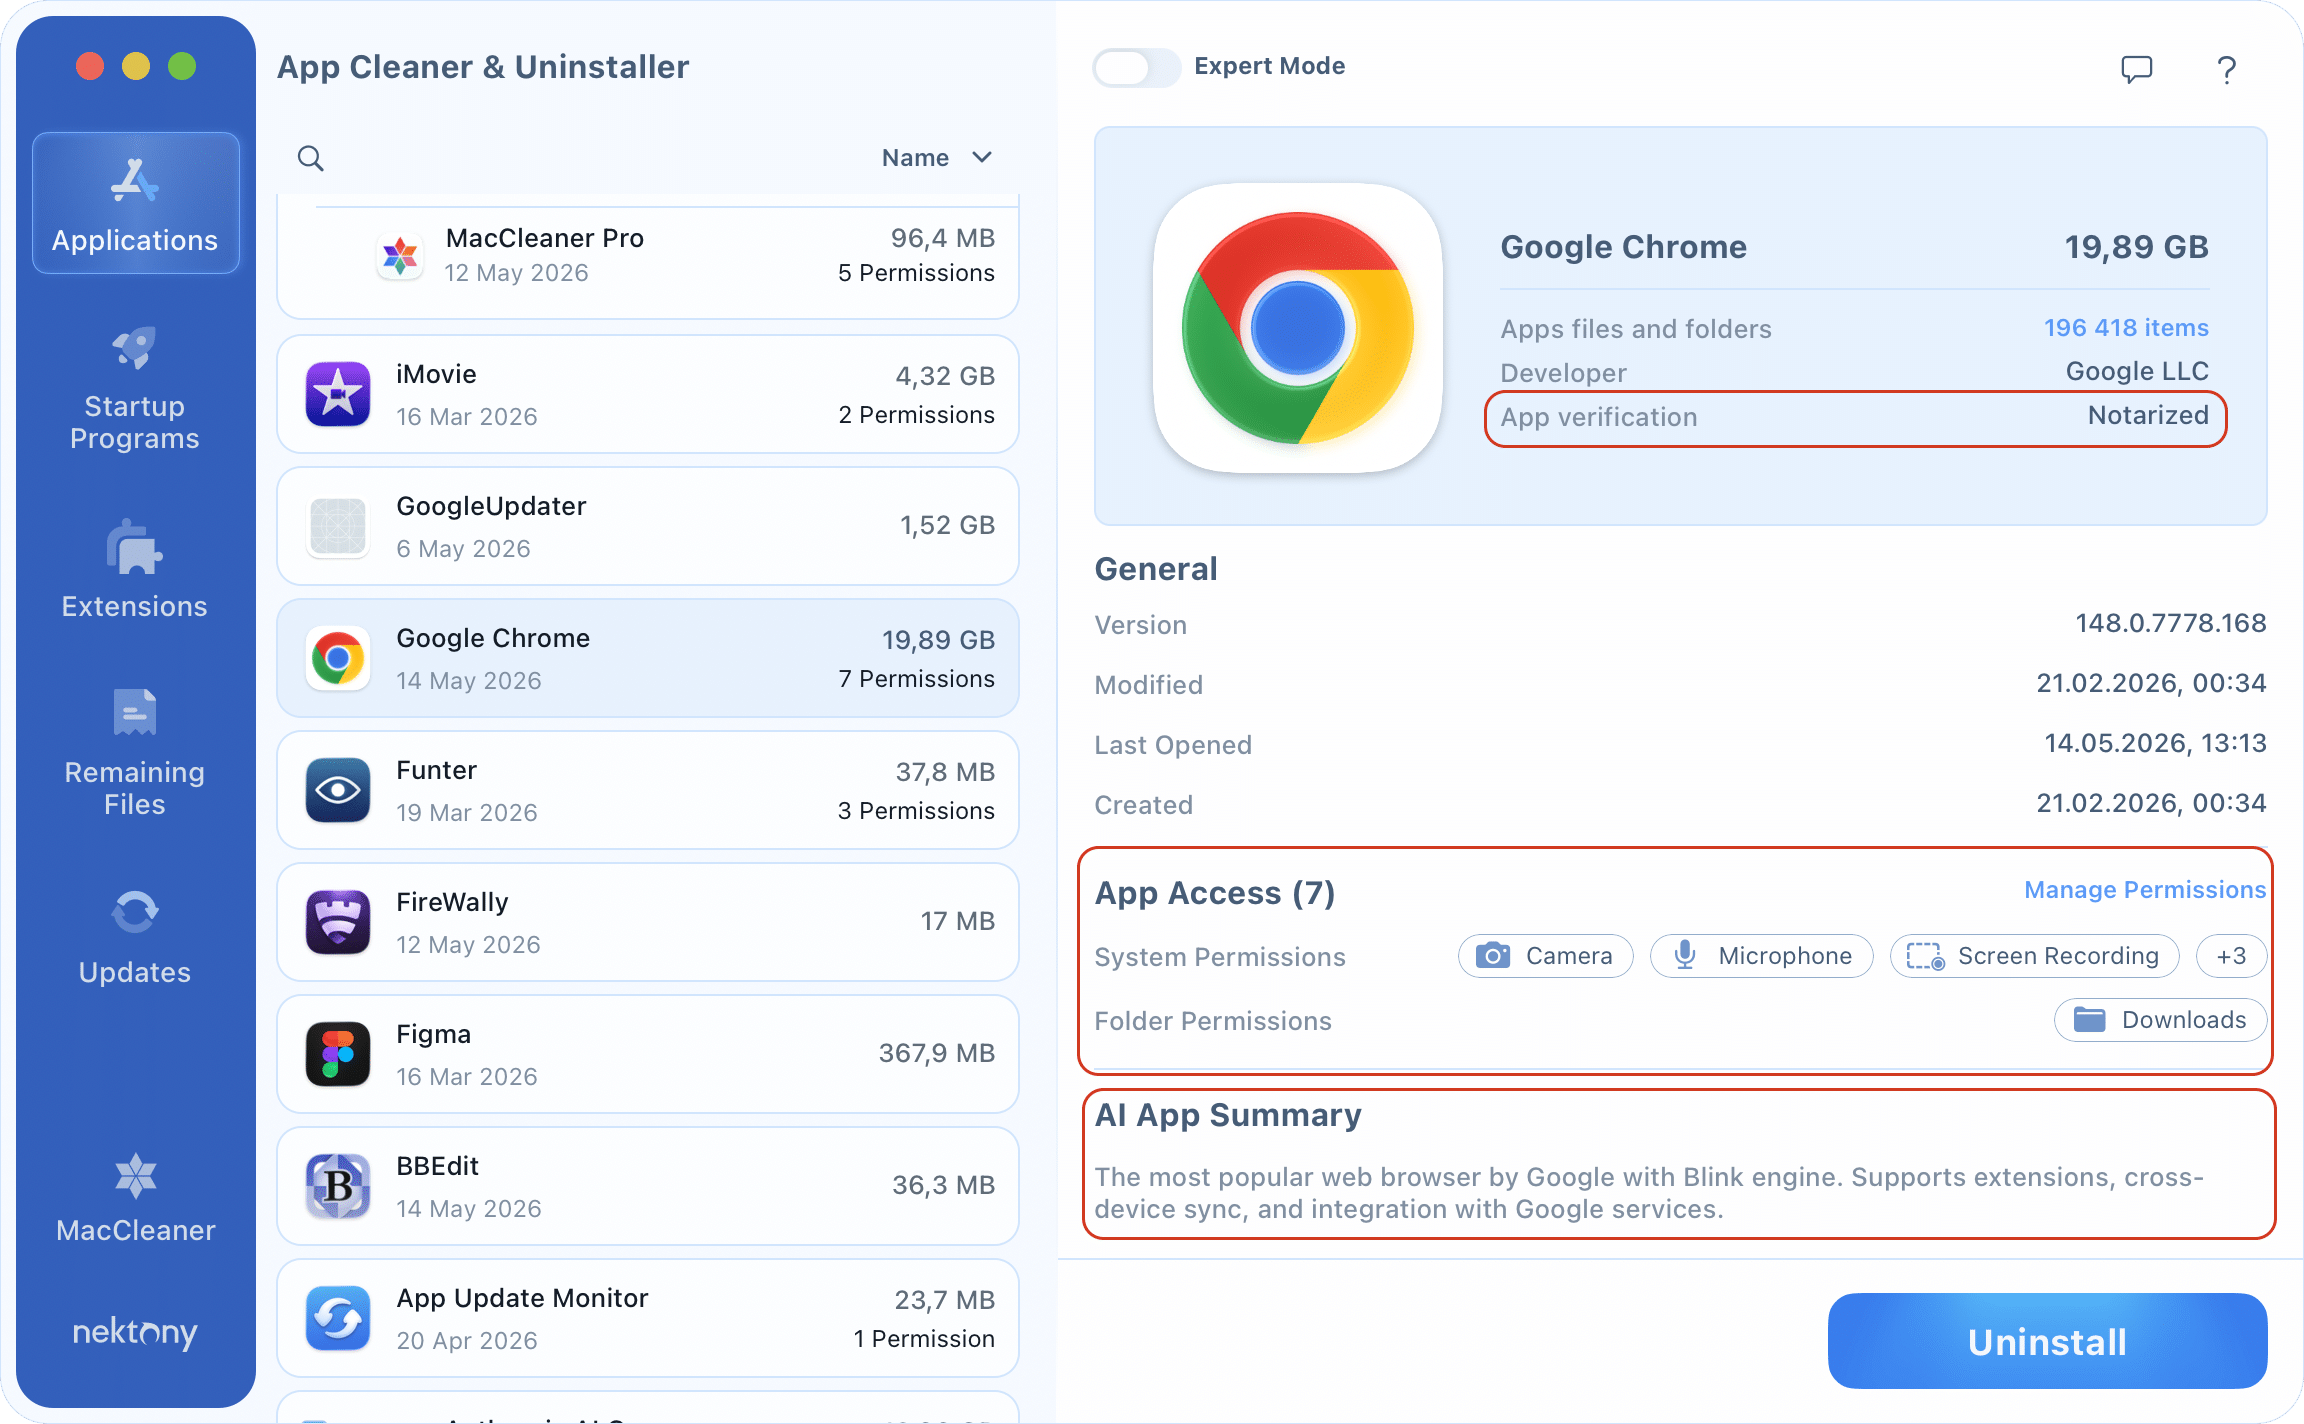
Just click on any app to see a list of its temporary files and folders in the right column. You can also view its detailed security profile, including:
- App Access: A transparent view and control center for the sensitive data apps can access. Effortlessly manage your privacy by reviewing and disabling permissions for your Camera, Microphone, Location, and more.
- Apple Verification: Verification that the app is recognized by Apple as safe and malware-free.
- AI App Summary: A smart description of what the app does, helping you identify forgotten, unknown apps.
If you want to delete an app completely, follow these two easy steps:
- Select an app you want to remove and click the Uninstall button.
- Confirm the removal by clicking the Remove button.
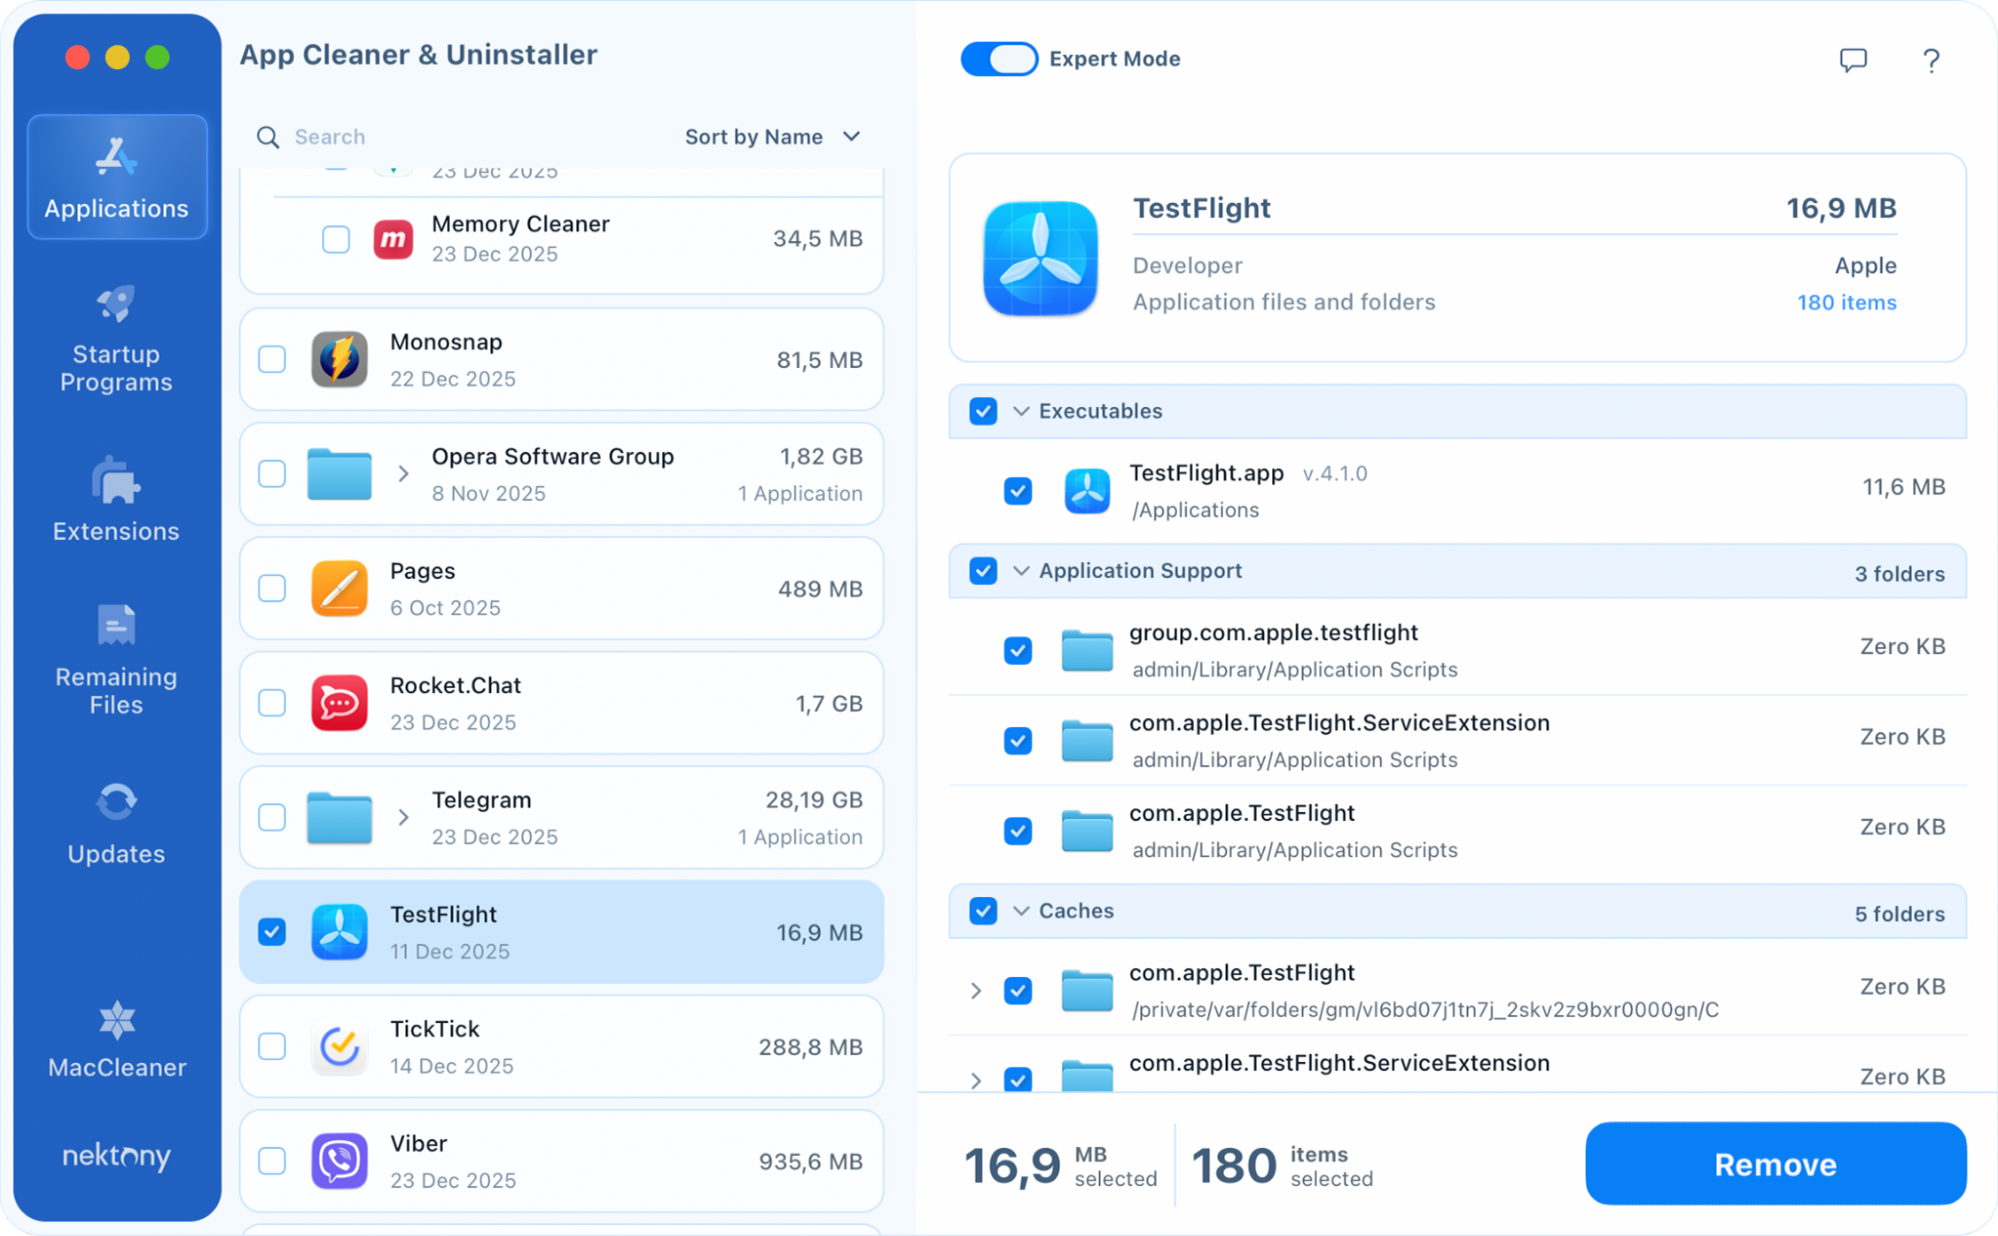
If you want to clean up an app and remove only its support files in order to free up some space on your disk or reset an app to the first-launch state, then do the following:
- Enable Expert Mode.
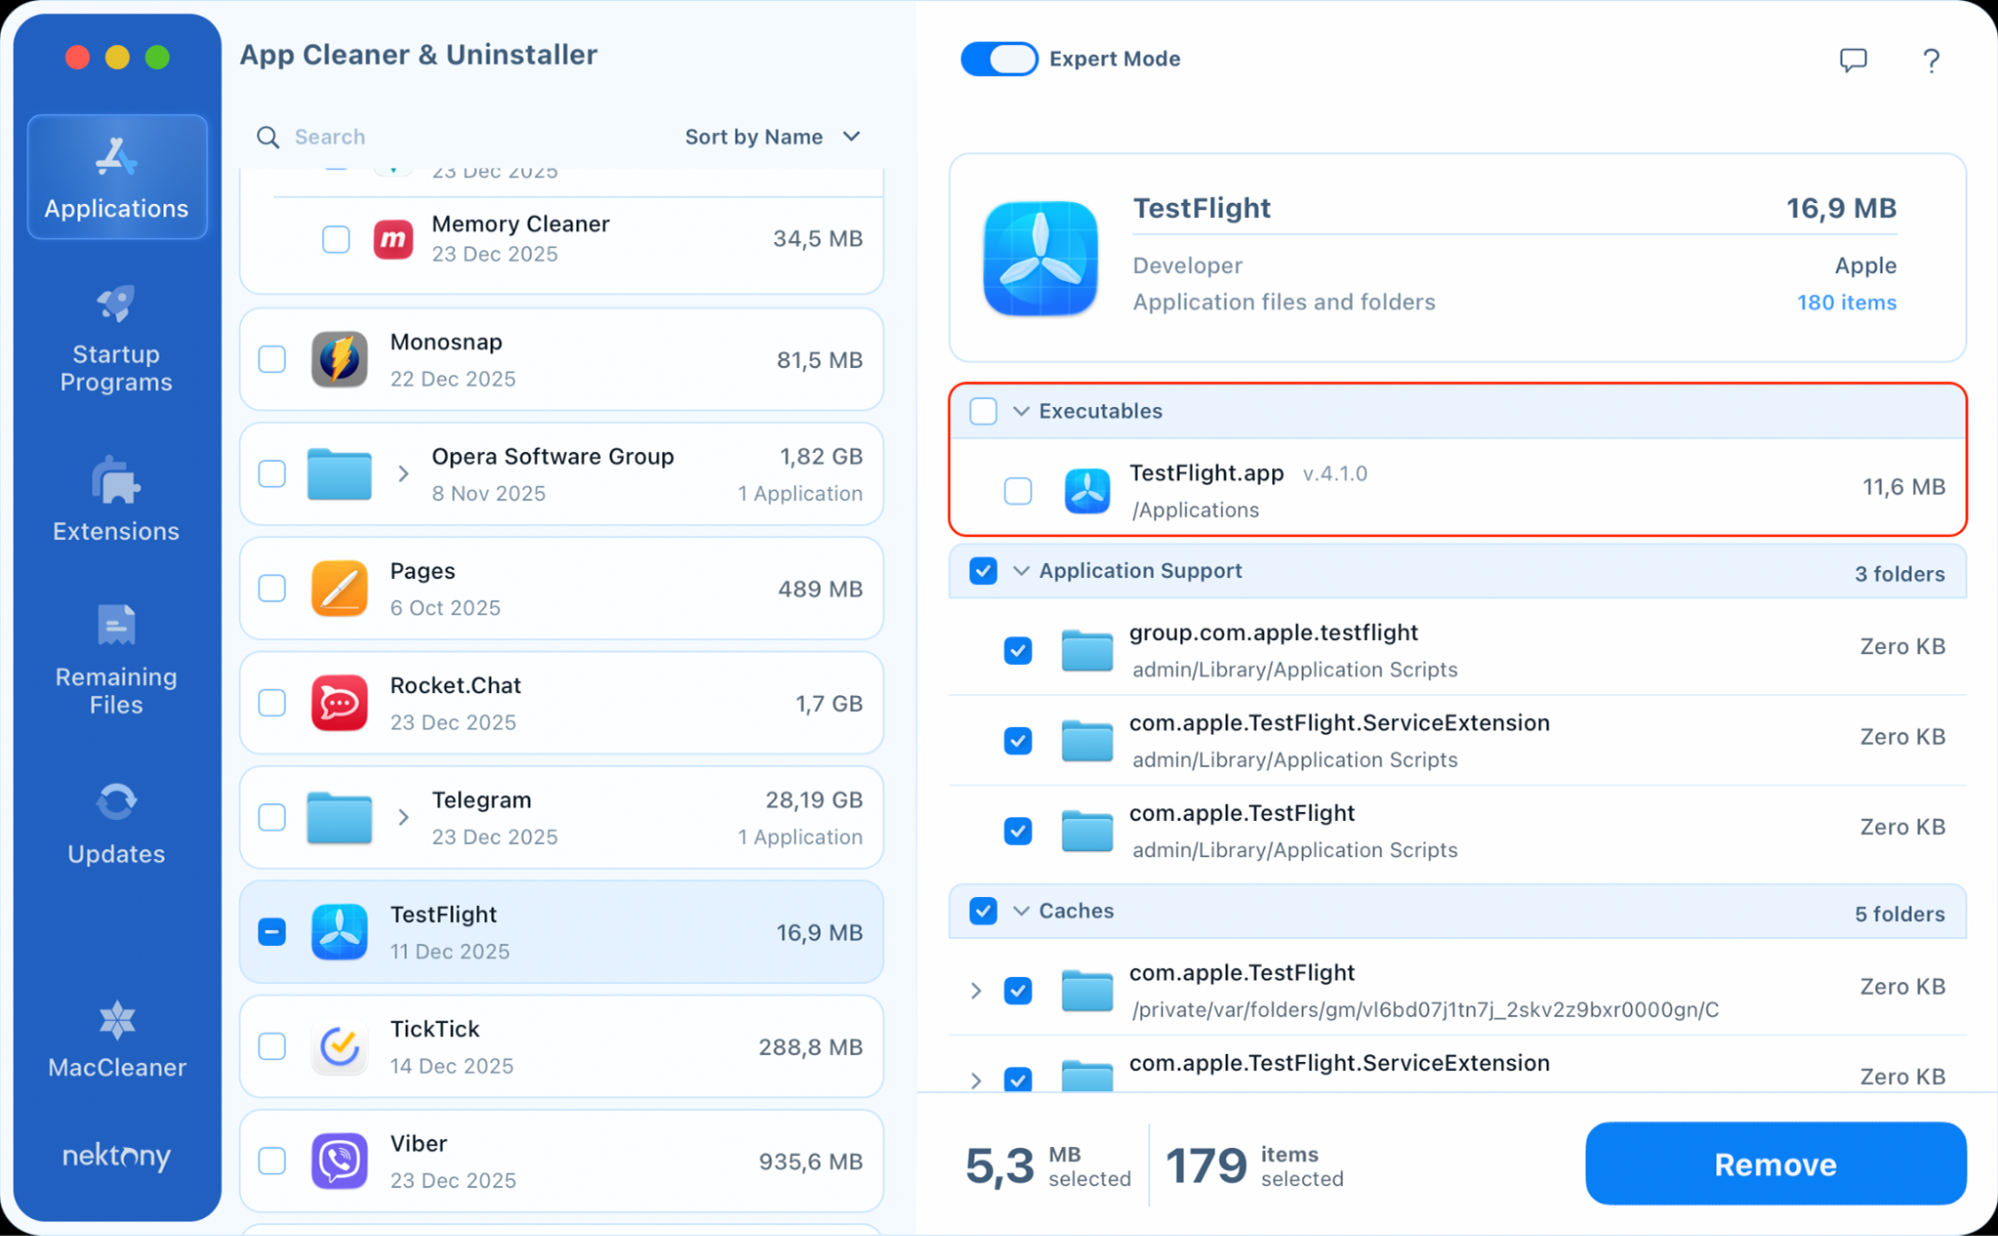
- Select all associated files except for the executable.
- Click the Remove button.
- Review the selected files, then confirm the removal.
Manage startup apps
When you turn on your Mac, several applications and services may start automatically in the background. While some are necessary, too many startup items can significantly increase boot time and consume valuable CPU and RAM resources, slowing down your system.
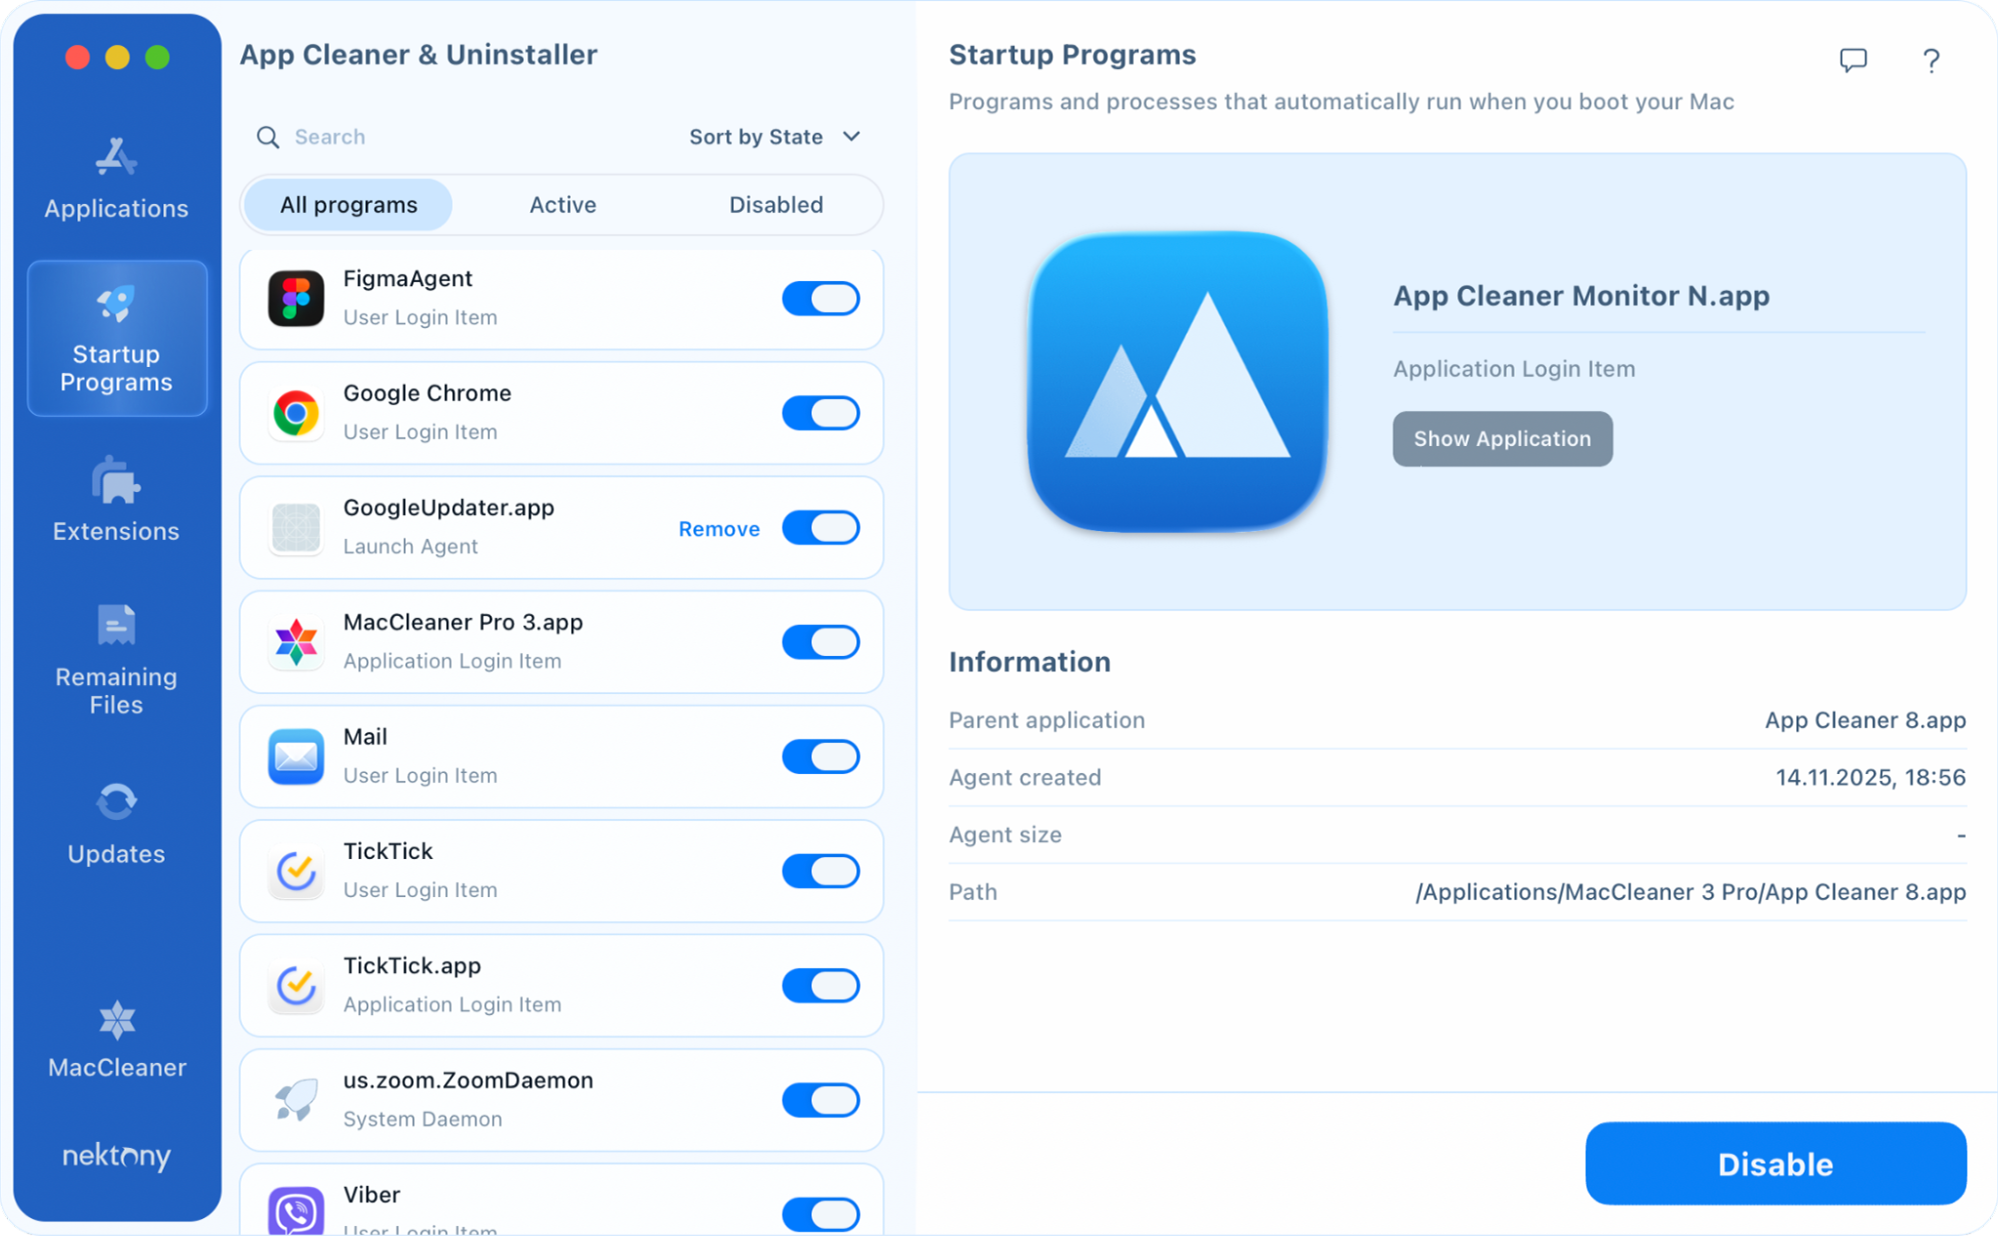
The Startup Programs section provides a comprehensive overview of everything that launches at login, including hidden background processes that are usually difficult to find.
How to manage startup items:
- Go to the Startup Programs tab in the left sidebar.
- You will see a list of login items, launch agents, and system daemons.
- Use the On/Off switch next to any item to disable it.
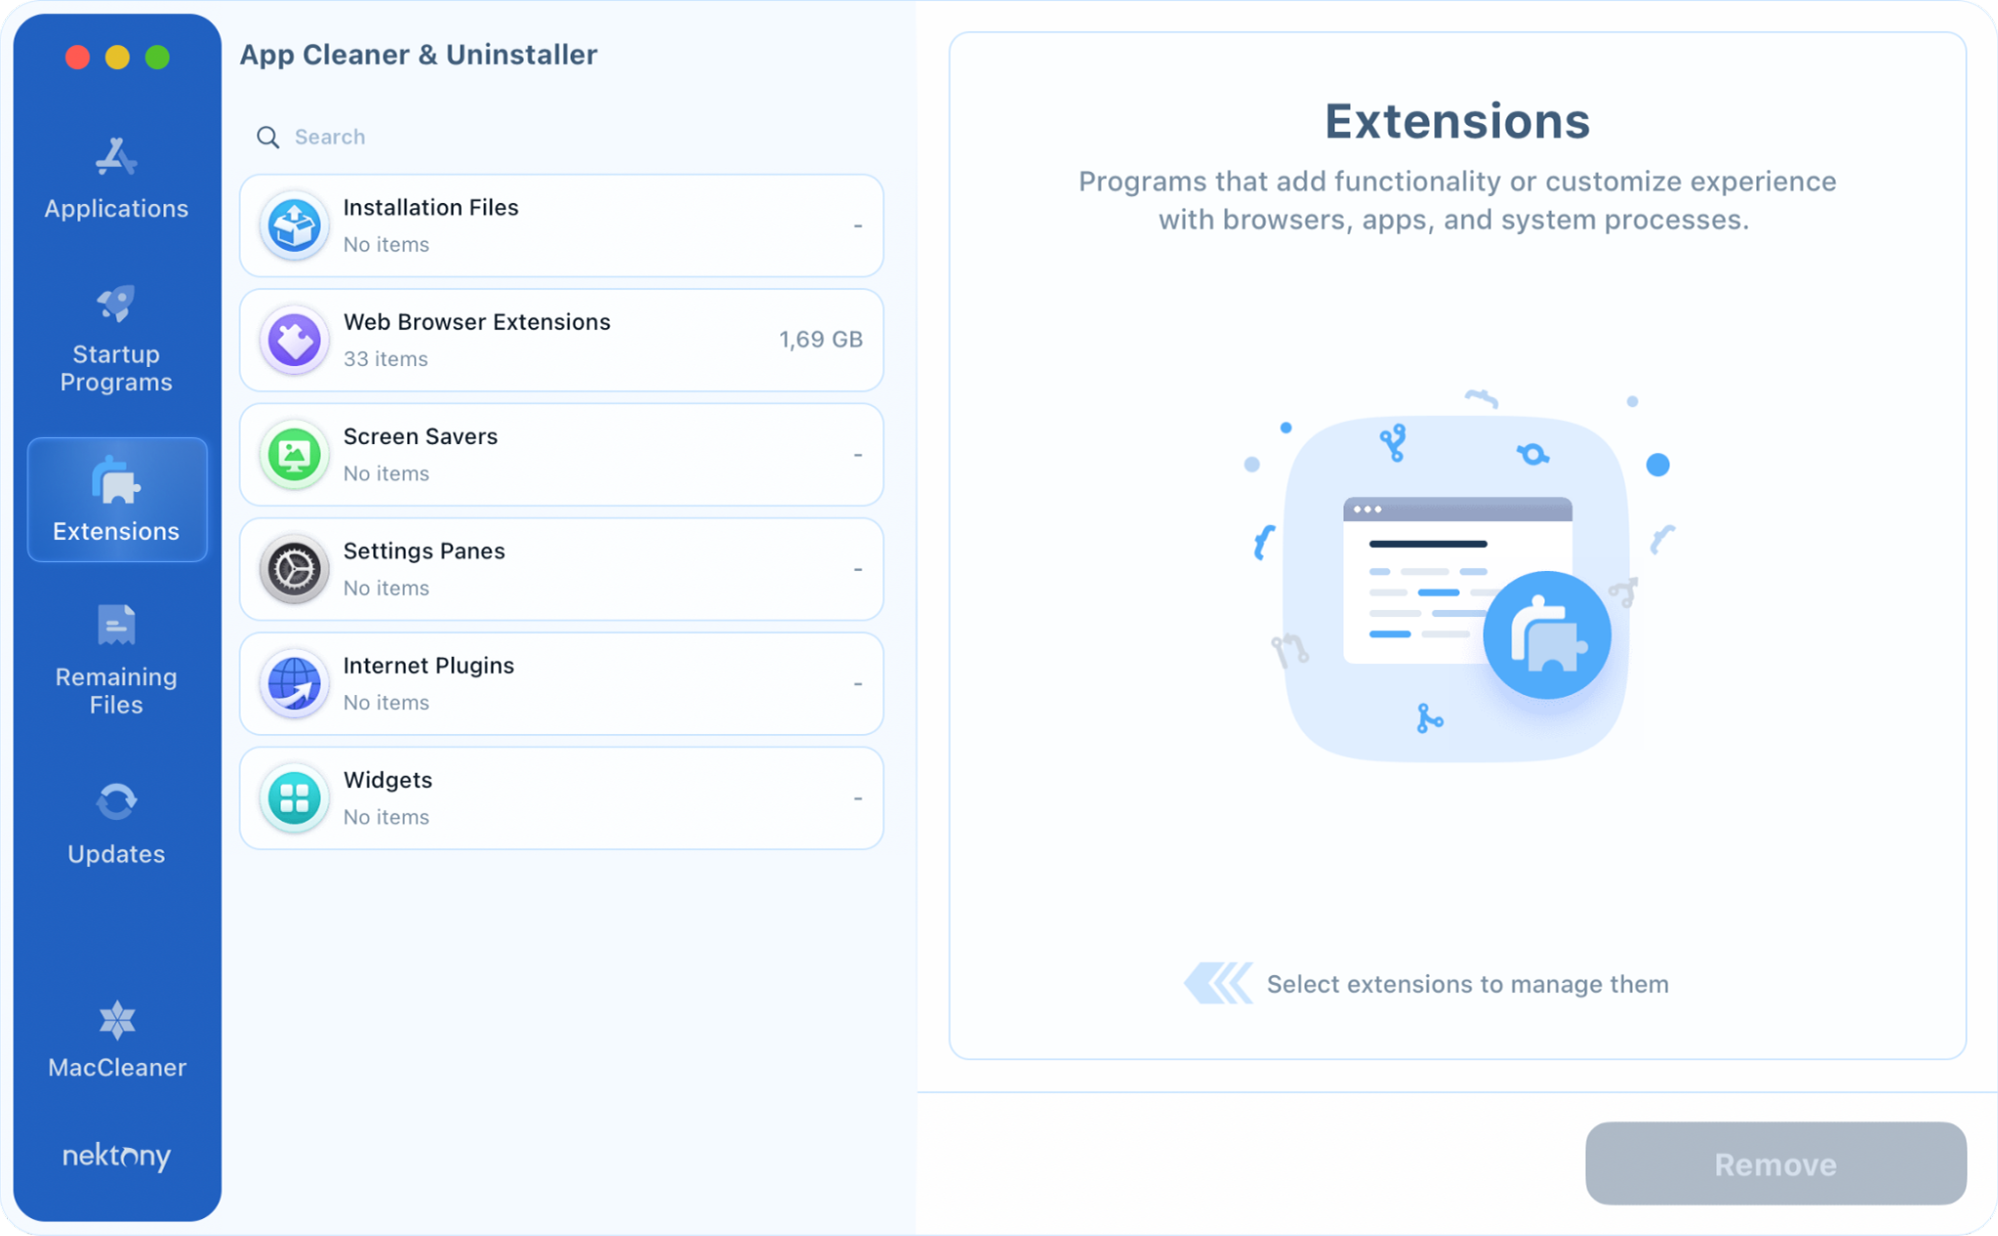
Manage Extensions
App Cleaner & Uninstaller allows you to manage and remove user and system extensions from your Mac:
- Launch Agents – hidden or background programs that run when you log in to your user account or start your system.
- Login Items – special agents of programs that run on user login.
- Installations – files that you download for installing apps on your Mac.
- Web Browser Extensions – special extensions for browsers that can modify and enhance their functionality.
- Screen Savers – programs that fill the screen when the computer is not in use.
- Preference Panes – special dynamically loaded plugins to customize the working of apps.
- Internet Plugins – program components that add specific features for Internet browsing.
- Widgets – programs that are launched by the Dashboard app.
To remove unneeded extensions, do the following:
- Locate and select the extensions you want to remove.
- Click the Remove button.
- Confirm the removal.
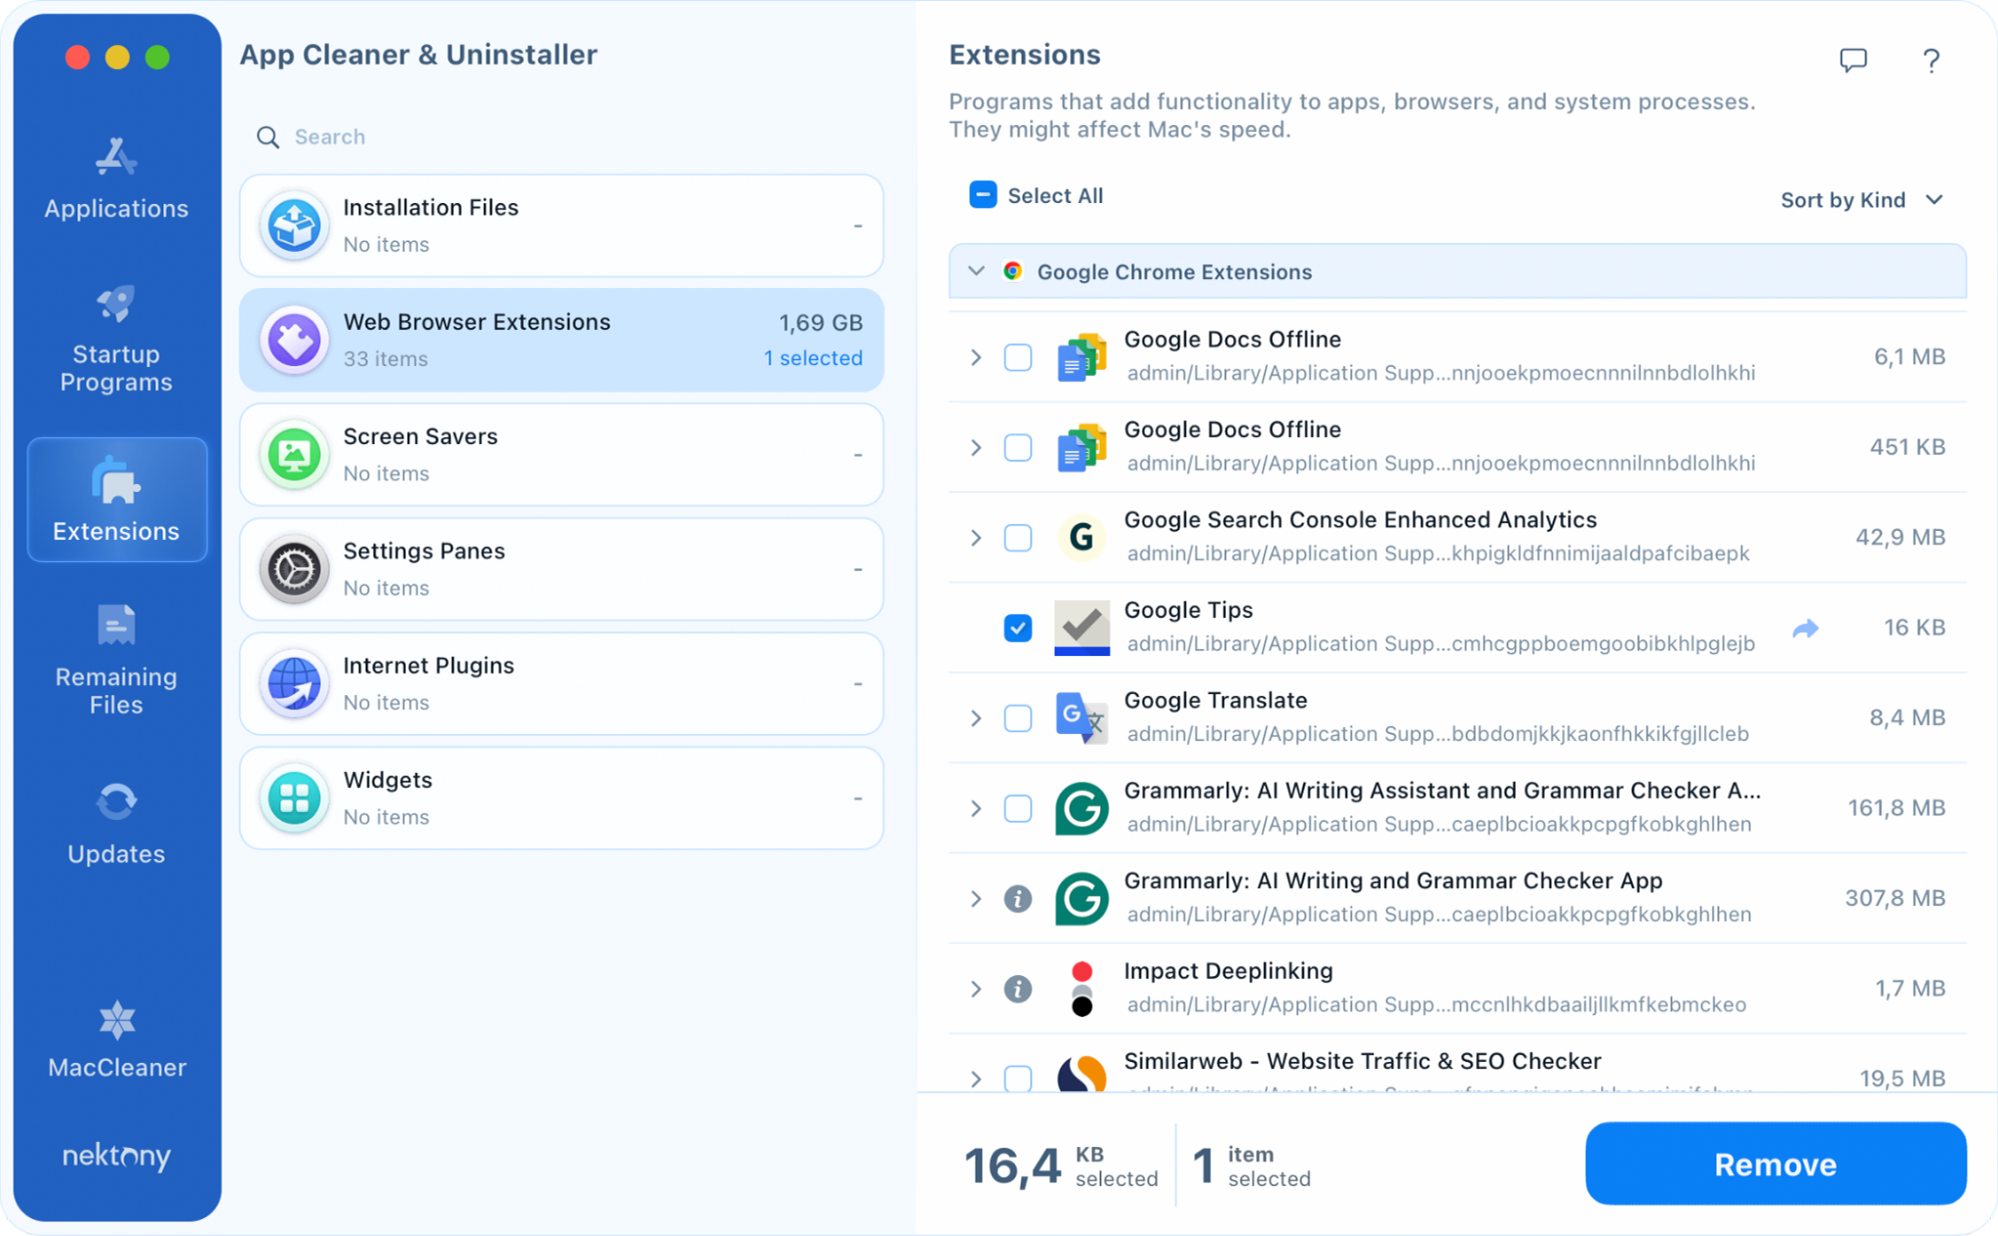
You can also open each extension file in Finder right from the application. For this, just click the Reveal in the Finder window.
Important note: be careful when you remove system extensions such as screen savers, preference panes, Internet plugins, and widgets. Removal of important items may damage the system operations.
Settings Panes
Also, you can open the settings pane by clicking the Gear icon next to the pane’s name.
Permission
But note that when you do it for the first time, the system will ask your permission to allow App Cleaner & Uninstaller to control System Preferences. Click OK to allow quick access to the preference panes from App Cleaner & Uninstaller.
If, for some reason, you clicked “Don’t Allow,” and now you want to change the permission, do the following:
- Open System Settings.
- Go to the Privacy & Security section
- Scroll down and click Automation.
- Select App Cleaner & Uninstaller and enable Automation for it.
Delete Remaining Files
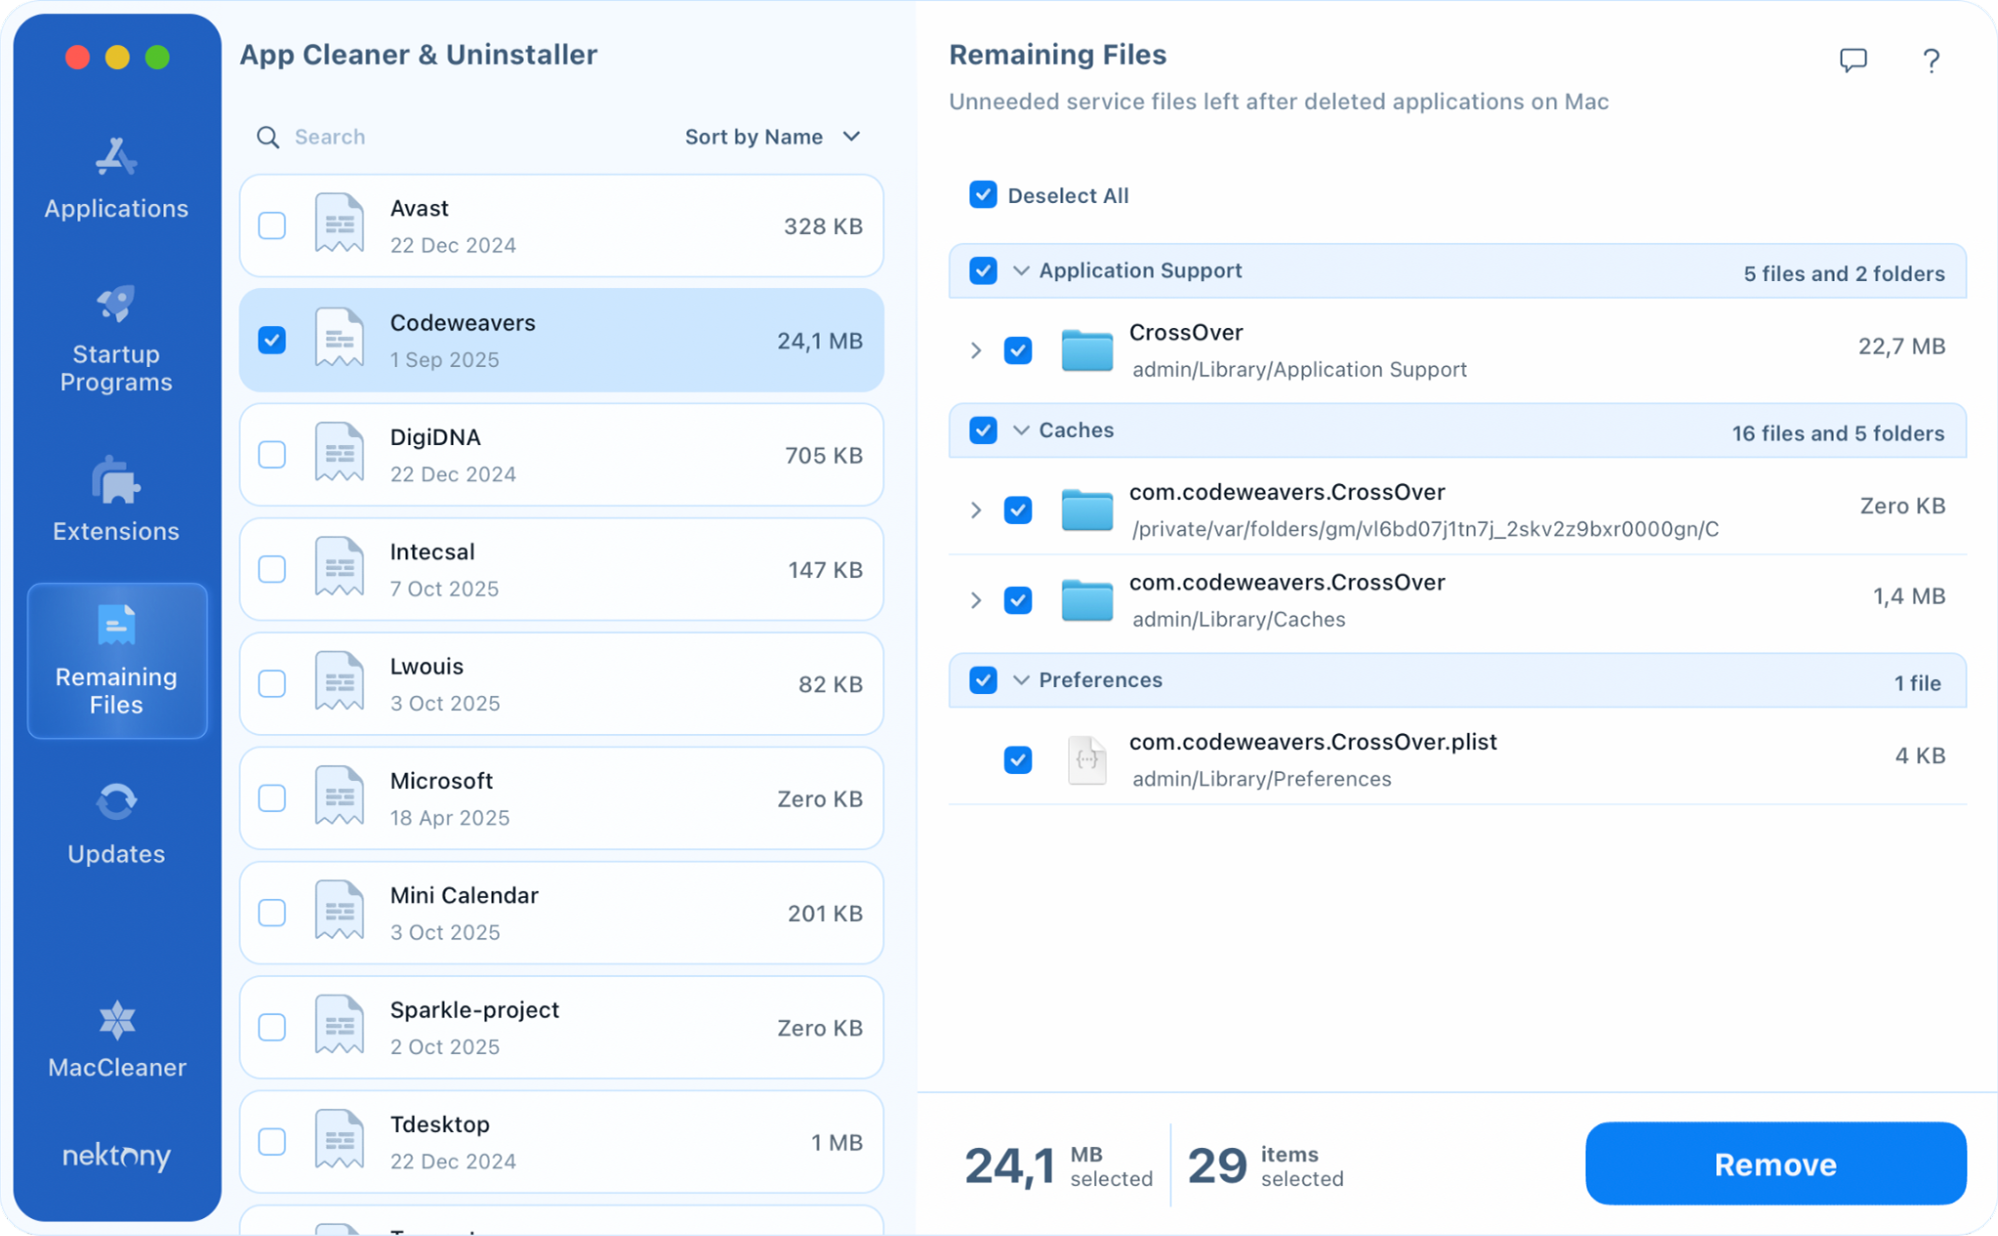
The remaining files are broken service files of already deleted apps. When you remove apps by simply putting them into the Trash, their service files remain on the disk. With App Cleaner & Uninstaller, you can find and remove them. For this, switch to the Remaining Files panel.
- Select an element from the list of Remaining Files to see all related files in the right column.
- Select all remains and click the Remove button.
- Confirm the removal.
Note: Please make sure you don’t need these files when removing the remains. Deleting certain files without removing the app can cause malfunctions.
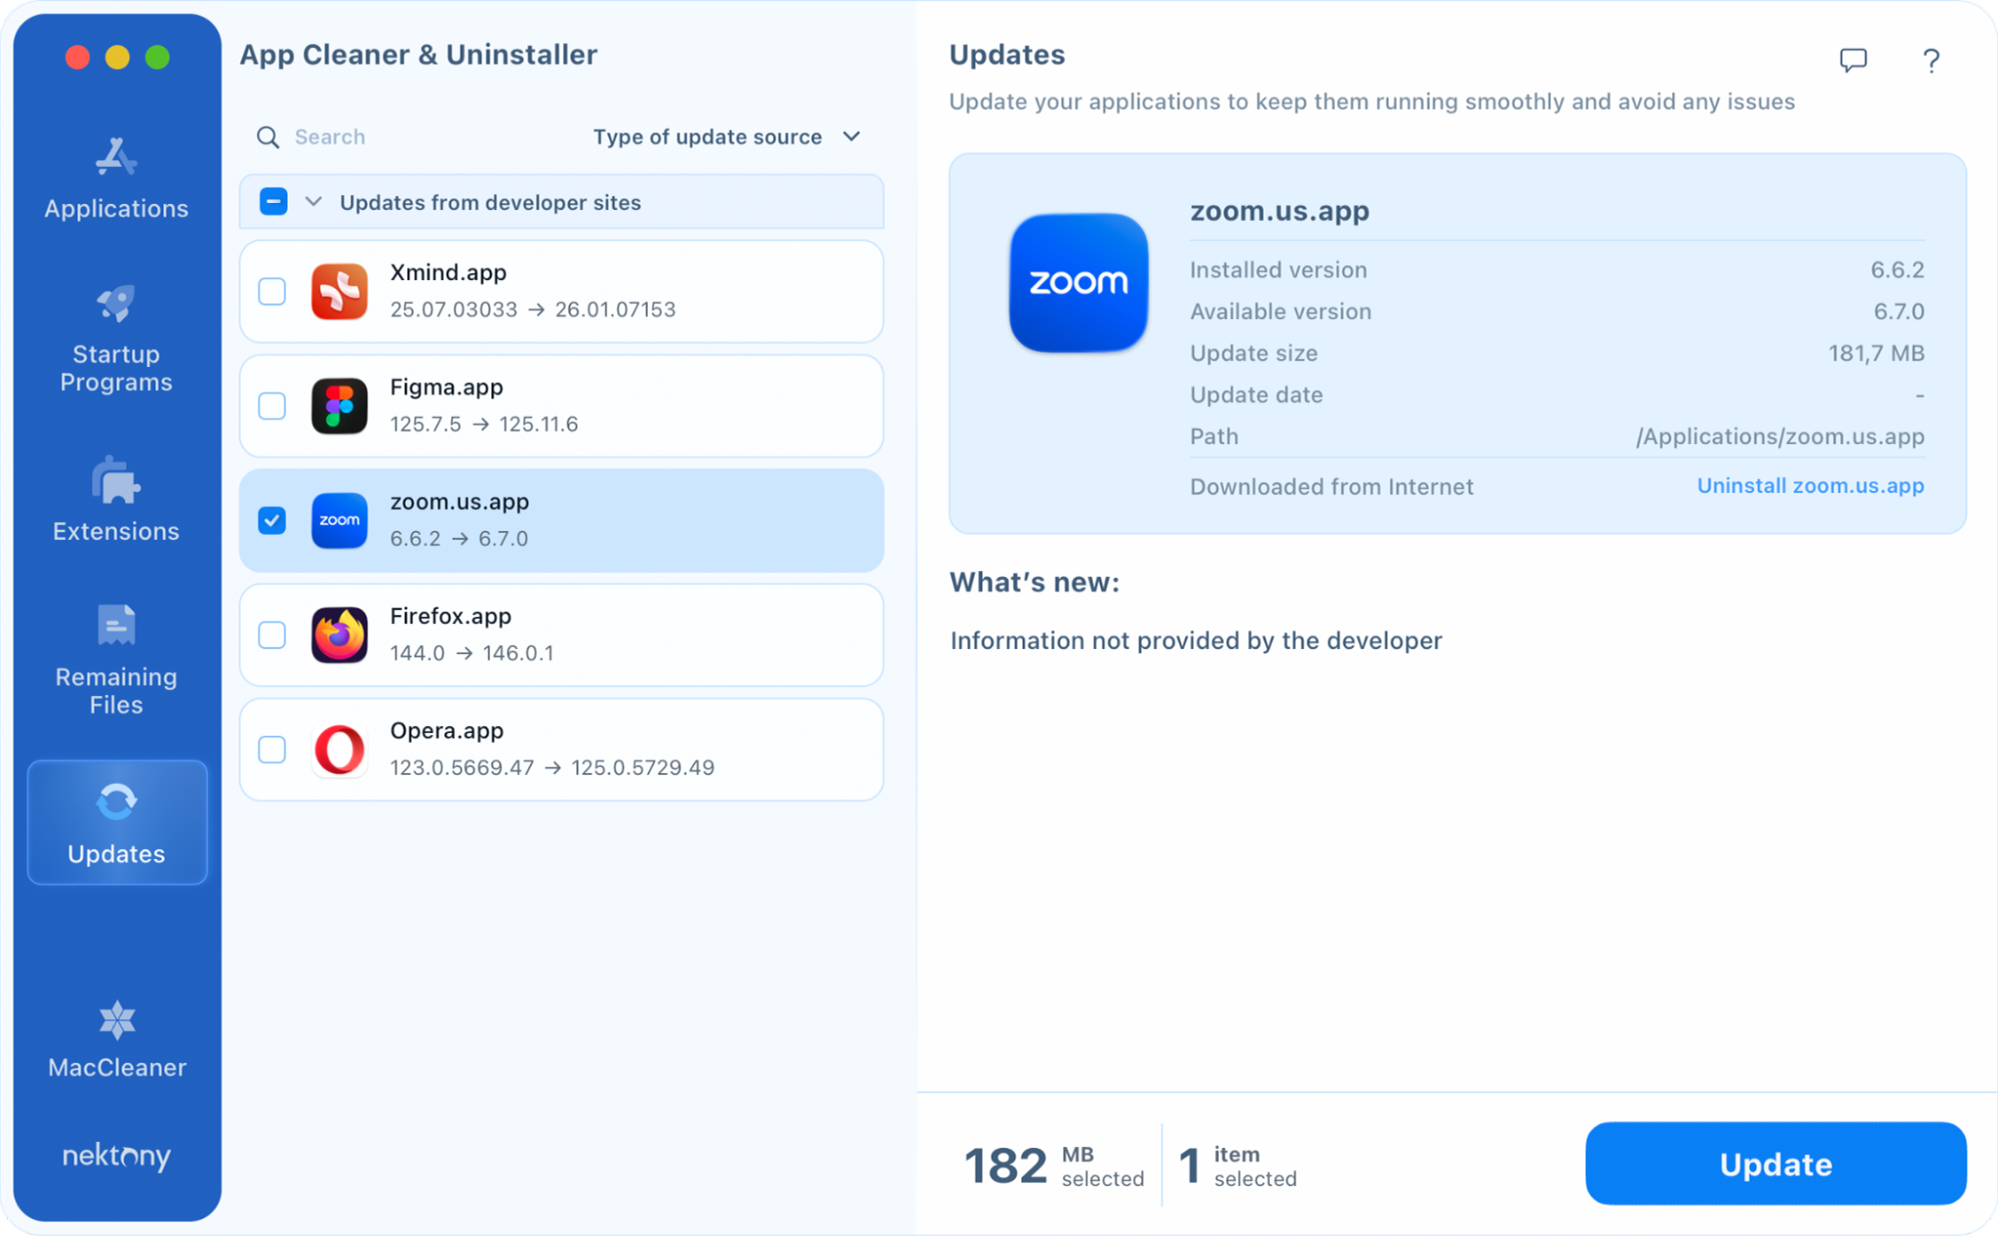
Update Apps
Keeping your software up to date is essential for your Mac’s security and performance.
App Cleaner & Uninstaller’s Updates feature makes this process easy and quick. Instead of opening every individual app to check for updates or searching the web for the latest versions, you can manage everything from a single window.
How to update apps:
- Go to the Updates tab in the left sidebar.
- Review the list of outdated applications.
- Select the checkboxes for the apps you wish to refresh.
- Click the Update button and confirm the action.
Change Settings
You can customize App Cleaner & Uninstaller in its Settings. You can find settings in the menu bar.
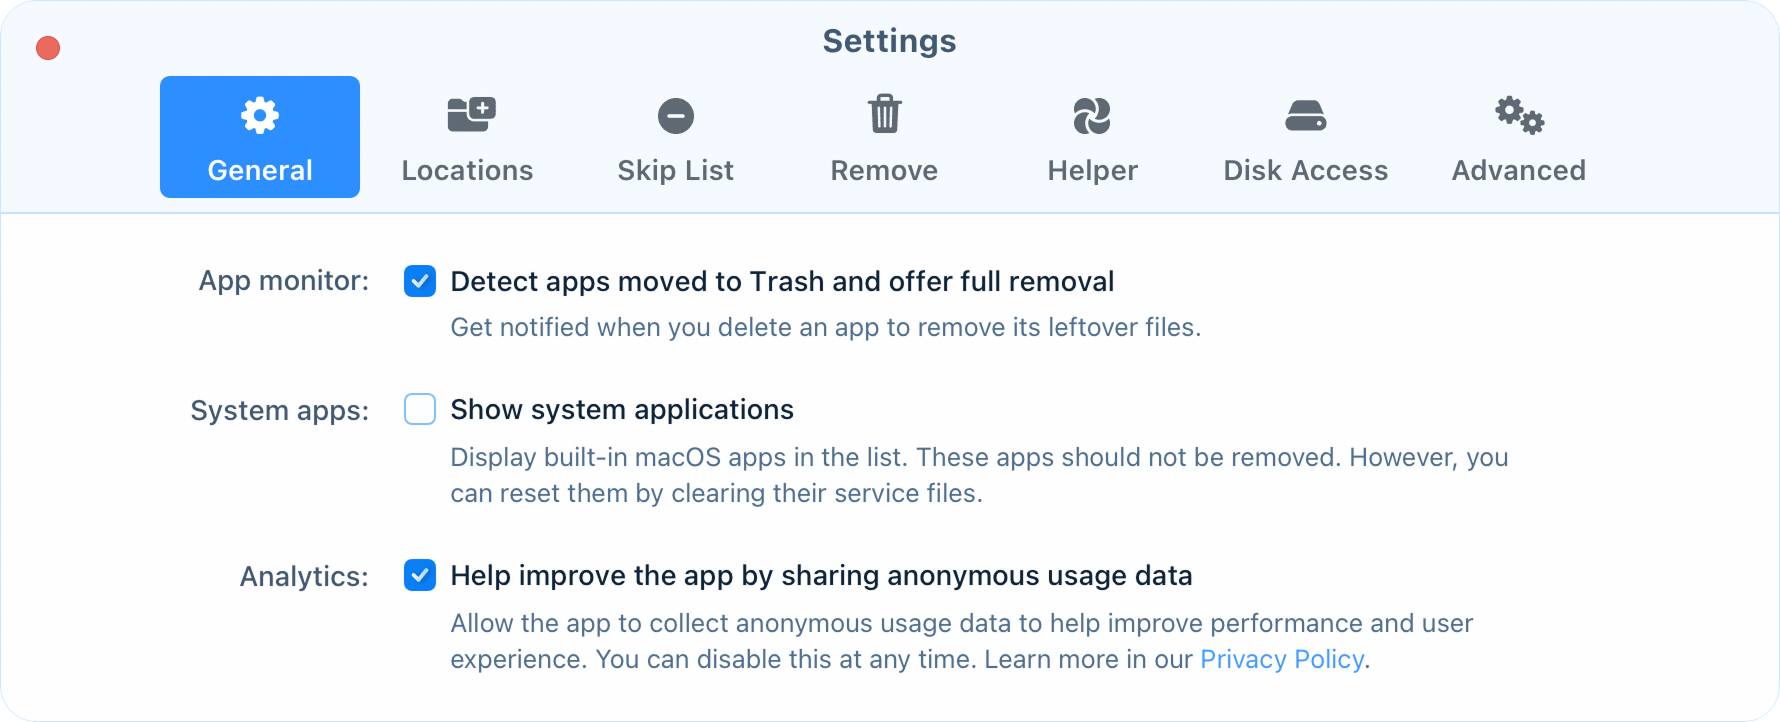
General Tab
In the General tab, you can change the following settings:
- Enable or disable the option when App Cleaner & Uninstaller monitors deleting apps on your Mac and reminds you to delete their service files too.
- Enable or disable searching for service files in System folders
- Enable or disable sending anonymous usage data to the developer in order to improve any issues.
- Set up the Large & Old criteria – use the line cursors to put a reference point of size and date of usage for scanned apps.
Locations
By default, App Cleaner & Uninstaller searches apps in the Applications folder. In the Locations tab, you can add additional folders to be scanned for apps and extensions. Use the “+” and “-” buttons to add or exclude a folder to be scanned.
Skip List
In this tab, you can exclude apps from being scanned by App Cleaner & Uninstaller. This option will be helpful when you want to avoid accidental uninstallation of some apps and prefer not to see them in the Applications section of the uninstaller. Use the “+” and “-” buttons to add or remove apps from the Skip list.
Remove
In the Remove section, you can set up the following settings:
- Choose whether to uninstall apps permanently or move their files first to the Trash. By default, App Cleaner & Uninstaller moves all items of apps to the Trash, so that you can restore them.
- Enable or disable the option to show the confirmation window after successful removal.
- Enable or disable logging removed files – keep your removal history if you want to easily find the deleted files in the Trash.
- Use the Show Logs button if you need to view where log files are stored in Finder.
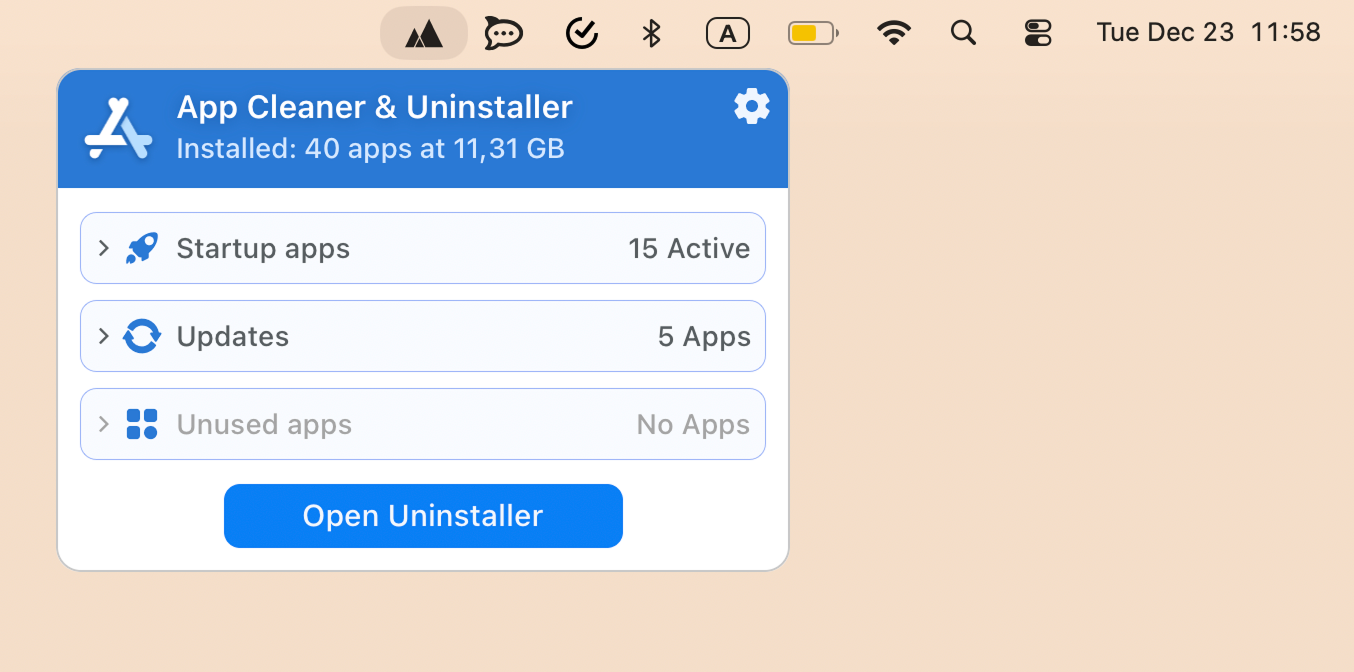
Helper
The Helper tab allows you to add the App Cleaner & Uninstaller menu bar agent. This background tool provides quick access to core features and monitors your system in real-time.
From the menu bar icon, you can quickly view and manage:
- Startup apps: Enable or disable programs that launch at login.
- Updates: Check for and install the latest software versions.
- Unused apps: Identify applications you haven’t opened in a long time to save disk space.
Disk Access
In the Disk Access tab, you can verify if you have granted the application the necessary permissions to function correctly. For security reasons, macOS requires manual authorization for apps to access private data. Because App Cleaner & Uninstaller scans your entire hard drive to locate service files, manage extensions, and restore items from the Trash, it requires Full Disk Access.
Advanced
The Advanced tab allows you to customize intelligent detection features and the overall look of the application:
- Set the specific timeframe that determines when an application is flagged as “unused” in your scan results.
- Choose Light or Dark themes, or select “Auto” to match your macOS system appearance.
- Enable the “App Summary powered by Apple Intelligence” to receive brief, AI-generated explanations of what specific applications on your Mac do.
- Reset Application Settings: Use this button to instantly restore all App Cleaner & Uninstaller preferences to their original factory defaults.
Use Shortcuts
App Cleaner & Uninstaller provides built-in shortcuts you can use to run some commands. Here is a short list of them:
⌘R – rescan
⌘O – open Finder to choose a specific app for uninstallation
⌘⌥O – open Finder to choose a specific app and remove its service files
⌘⇧O – Show apps in Finder
⌘I – Show information about the selected app
⌘1 – Switch to the Applications section
⌘2 – Switch to the Extensions section
⌘3 – Switch to the Remains section
⌘A – Select all apps with their service files
⌘⇧A – Select service files of all apps
⌘D – Deselect marks from all previously selected items
Troubleshooting
Error with Deleting Apps
Sometimes, it happens that while uninstalling some apps, you face an error with deleting their service files and folders. In this case, App Cleaner & Uninstaller shows the exclamation mark in the Removal window.
Here are the reasons why the files can’t be deleted:
- There are running processes in the background related to the app. So check the running processes using Activity Monitor, close processes related to the app you want to uninstall, and try once again to remove the files.
- The apps have kernel extensions that protect themselves from being removed. It is possible to remove kext files only in the recovery mode of your Mac. After the kext files removal, you will be able to uninstall apps completely.
- The files are protected from removal by System Integrity Protection (SIP) by Apple. Some apps can create files that Apple thinks are default system files, and, as a result, it does not allow removing them. To solve this issue, you have to disable the Apple System Integrity Protection.
Get the License
App Cleaner & Uninstaller provides a free trial with unlimited features. Once the trial ends, you have to get the license to use the app without any limitations.
- Click Unlock Full Version at the top.
- Click Go to Purchase.
- Select the license option and make the purchase.
- As soon as the transaction is complete, you will get the license code by email.
- Then use this key to activate App Cleaner & Uninstaller’s full version.

Uninstallation Guide
If, for any reason, you want to delete App Cleaner & Uninstaller or reinstall it, follow these steps:
- Open App Cleaner & Uninstaller.
- Go to its Settings from the menu bar.
- Switch to the Advanced tab.
- Scroll down and click on Remove.

The app will be completely deleted from your Mac.
If you have App Cleaner & Uninstaller version 6.10 or earlier, follow these steps to uninstall the app:
- Go to the Applications folder and remove App Cleaner & Uninstaller from there.
- Now you need to find and delete the app’s support files. To find them, open Finder and press Cmd+Shift+G.
- In the pop-up that appears, type ~/Library and press Enter.
-
In Library, find and remove the following subfolders related to the app:
- ~/Library/Application Support/com.nektony.App-Cleaner-Pro
- ~/Library/Application Scripts/com.nektony.App-Cleaner-Pro
- ~/Library/Caches/com.nektony.App-Cleaner-Pro
- ~/Library/Preferences/com.nektony.App-Cleaner-Pro.plist

- Empty the Trash bin and restart your Mac.
